

How to Sterilize Jars Like a Pro
Homemade Food Deserves Clean Jars
Making homemade jam, pickles, sauces, or baby food feels rewarding. We spend hours preparing fresh ingredients. However, one dirty jar can ruin the entire batch.
That is why how to Sterilize Jars remains one of the most important food preservation skills. Proper sterilization helps extend shelf life, keeps food fresh, and lowers the chance of spoilage. More importantly, it helps with reducing the risk of harmful microorganisms growing inside sealed containers.
As a manufacturer of HOCl Generator systems, we have worked with food factories, farms, laboratories, and commercial kitchens. We have learned that good sterilization combines clean equipment with the right disinfectant. The process does not need to feel complicated. It simply needs to work every time.
Why Jar Sterilization Matters
Clean-looking jars are not always clean. Tiny organisms often remain invisible to our eyes.
These include:
Bacteria
Yeasts
Mold spores
Bacteria, viruses and fungi
Environmental contaminants
Even a small number of microorganisms can shorten the shelf life of homemade foods.
Sterilizing jars offers several advantages.
Improves food safety
Helps preserve flavor
Reduces spoilage
Prevents unpleasant odors
Protects nutritional quality
Supports longer storage
We always remind customers that sterilization protects both the food and the people who enjoy it.
Traditional Methods to Sterilize Jars
Several methods work well. Each offers different benefits depending on your production scale.
Boiling Water Method
Many families still prefer boiling water.
The steps are simple.
Wash jars with warm soapy water.
Rinse thoroughly.
Place jars into a large pot.
Cover with water.
Bring to a rolling boil.
Continue boiling for 20 minutes.
Remove jars carefully.
Air dry without touching the inside.
This method costs little and works well for home canning.
Oven Sterilization
Some people like using an oven.
Follow these steps.
Wash jars first.
Heat the oven to about 120°C (250°F).
Place jars upside down.
Heat for 20 minutes.
Remove carefully before filling.
Never place cold jars into a very hot oven. Sudden temperature changes may crack the glass.
Dishwasher Sterilization
Modern dishwashers also help.
Choose the hottest washing cycle. Fill the jars while they remain warm. Although convenient, this method depends on your dishwasher's temperature.
Why HOCl Makes Sterilization Easier
Traditional methods work well. However, modern food production often needs something faster.
This is where hypochlorous acid hocl becomes valuable.
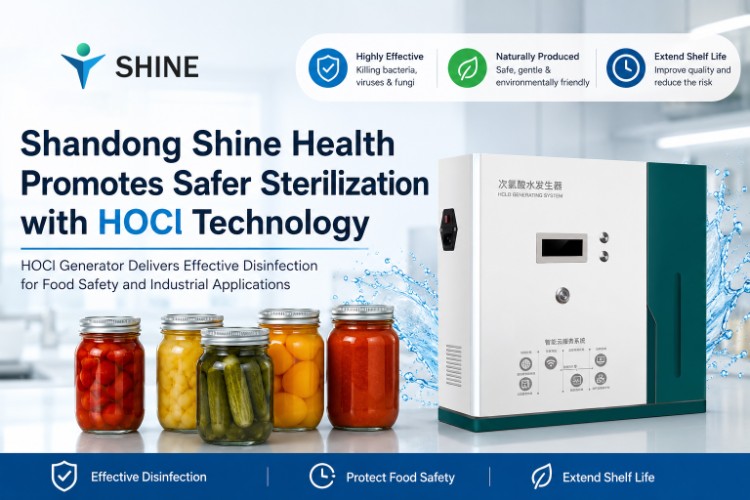
Our HOCl Generator produces fresh hypochlorous acid from water, salt, and electricity. Some systems also use a carefully controlled saline solution during production.
Unlike harsh chemicals, HOCl already exists in nature.
Nature Already Uses HOCl
One amazing fact surprises many people.
Our white blood cells produce hypochlorous acid naturally. They create it while fighting harmful microorganisms inside the body.
Because HOCl is naturally produced, scientists have studied it for decades.
That natural origin gives many users confidence when choosing it for effective disinfection.
Fast and Highly Effective
HOCl works against many common contaminants.
It supports killing bacteria, mold, and many microorganisms quickly.
Many studies report strong performance against:
Common bacteria
Bacteria, viruses and fungi
Mold spores
Biofilms
This broad activity makes HOCl highly effective for food processing equipment, packaging areas, and clean containers.
Using HOCl for Jar Sterilization
Many commercial kitchens now include HOCl in their sanitation programs.
Our recommended process looks like this.
Step 1: Clean First
Always remove food residue before disinfecting.
Wash jars with detergent and clean water.
Step 2: Apply HOCl
Spray or rinse jars using hypochlorous acid spray.
Typical food-contact concentrations range between 50–200 ppm, depending on local regulations and application needs.
Step 3: Contact Time
Allow enough contact time.
Many applications recommend approximately 30 minutes for complete sanitation under challenging conditions. Lighter contamination often requires much less time.
Avoid wiping the solution away immediately.
Step 4: Dry Naturally
Allow jars to air dry.
Avoid touching the inside surfaces before filling.
Following these steps helps achieve effective disinfection while keeping the process simple.
HOCl Compared with Sodium Hypochlorite
Many people confuse HOCl with sodium hypochlorite.
Although both contain chlorine chemistry, they behave differently.
Feature | HOCl | Sodium Hypochlorite |
Main active form | Hypochlorous acid | Sodium hypochlorite |
Cleaning strength | Highly effective | Effective |
Odor | Mild | Strong chlorine smell |
Corrosion | Lower | Higher |
Skin friendliness | Better | Less suitable |
Widely used | Requires careful handling |
Because HOCl remains effective at lower chlorine levels, many food businesses prefer it for routine sanitation.
More Than Food Safety
HOCl continues to attract attention outside food processing.
Wound Care
Healthcare professionals often study HOCl for wound care because it helps clean damaged tissue.
Its gentle nature makes it useful in many medical products.
Skin Care
Many companies now include HOCl in skin care products.
Some people with acne-prone skin use hypochlorous acid spray after exercise or daily activities.
Many users appreciate that HOCl may help reduce unwanted microorganisms while causing less skin irritation than stronger disinfectants.
Even so, people should always follow product directions.
No product suits everyone.
Although uncommon, some individuals may experience mild adverse effects.
Best Practices for Longer Shelf Life
Jar sterilization works best when every step supports food safety.
We recommend following these habits.
Before Filling
Wash hands carefully.
Use fresh ingredients.
Inspect jars for cracks.
Replace damaged lids.
Keep work surfaces clean.
During Filling
Fill jars while warm.
Leave proper headspace.
Remove trapped air.
Seal immediately.
After Sealing
Store in a cool place.
Avoid direct sunlight.
Label each batch.
Record the production date.
Some refrigerated homemade foods stay fresh for about 14 days after opening. Others last much longer when canned correctly. Storage time depends on acidity, ingredients, and processing methods.
Choosing the Right HOCl Generator
Not every generator produces the same quality.
When selecting a HOCl Generator, we recommend checking these specifications.
Parameter | Recommended Value |
Available chlorine | 50–200 ppm |
pH | 5.0–6.5 |
ORP | +800 to +1200 mV |
Production type | On-site generation |
Water source | Clean potable water |
Salt source | Food-grade salt or approved saline solution |
On-site generation offers important advantages.
Fresh solution every day
Lower transportation costs
Reduced chemical storage
Stable production quality
Better operational flexibility
We believe fresh HOCl delivers better performance because users produce only what they need.
Common Mistakes We See
Experience teaches valuable lessons.
These mistakes appear often.
Skipping the washing step
Touching sterilized jar interiors
Using damaged lids
Shortening contact time
Mixing different disinfectants
Ignoring storage conditions
Avoiding these errors helps improve results without adding extra work.
After all, spending one extra minute today beats throwing away an entire batch tomorrow.
Conclusion
Learning how to Sterilize Jars gives every home cook and food producer greater confidence. Clean jars protect flavor, improve food safety, and extend shelf life. Traditional methods remain reliable, while modern HOCl technology offers another practical solution.
Our experience manufacturing HOCl Generator systems has shown us that fresh hypochlorous acid combines strong cleaning performance with simple operation. Whether you prepare homemade jam or manage commercial food production, careful sterilization always pays off. Small steps today help protect every jar tomorrow.